We all scream for Ice Cream!

I give my kids a dessert every night after dinner. The dessert varies from a piece of dark chocolate, to a fruit of their choice, and sometimes ice cream. I usually buy these little sandwiches from So Delicious. I like them because they are made with coconut milk and do not contain high fructose corn syrup…but even so they have sugar and are definitely not the best.  They love any of these options and it really does help them finish their dinner when they know they get a treat afterwards. The other day while I was making some baby food, I opened the drawer of containers and saw some popsicle things Orlando had bought. I had some yummy mango on hand and I thought, hmmmm I wonder if I should make the boys some healthy popsicles for after dinner dessert.

Here’s the recipe:

Mango/Pineapple/Banana Popsicles 

  • a cup of mango
  • a cup of frozen pineapple
  • 1/2 a banana
  • about 1/4 cup of yogurt
  • ice

I blended it all in my blendtec (pressed the ice cream button…love this thing!), poured it into the popsicle container, and popped them in the freezer. The next night I told my kids they could each have ice cream after dinner if they ate well. Of course its all in the pitch with these kids. I told them it was way cooler than the little sandwiches and I had made them just for them but they would need to be earned. They could not wait! Ok so its not actually ice cream. In spanish, its often called “duro frio.”  But the point is its cold, its sweet, its fun for the kids…and calling it ice cream just makes it that much better for them. IMG_0448 IMG_0449 Needless to say the popsicles were a hit. But here’s the coolest part…they loved it so much they asked me to make more. Now when given the option between the popsicle, a piece of dark chocolate or the so delicious ice cream sandwiches…they choose the popsicle! I’ve made strawberry/banana, mango/pineapple, mango/pineapple/banana. And just recently I made mango with chia seeds. The options are endless! The whole process takes about 5 minutes to make and then leave in the freezer overnight. It was fun to make them a homemade dessert that had no sugar, no mysterious ingredients, and tastes sweet! Its definitely worth the effort!!!

Baby Food

Becoming a mother for me was an overwhelming experience. I wanted to do it right. No, I wanted to do it perfectly. And when I say “do it” I mean be a parent. I refer to parenting as “it” because it felt like a project to me. It was this task that I had to accomplish. I took breast feeding classes and learned how to swaddle and read books about sleep. But as any mom knows, the “parenting degree” I obtained prior to giving birth did not make becoming a parent any easier. Because to sit in

a class and learn about breast feeding is quite different than actually getting that baby to latch on to your breast. And getting that perfectly tight swaddle is a little harder when the kid is kicking and screaming at the top of his lungs. Then there is so much to worry about. The nursing, the routine, the sleep, colic, vaccines, milestones, the list goes on and on…and all this worry is really exaggerated when you’re working on drastically interrupted sleep.  So when the time came for my first son to start solids, my brain was overloaded. I really didn’t feel that I had the capacity to take on the task of making baby food. And to be honest, I also didn’t know any better. At the time I did not know what I know now about food. I’m not even sure I knew that I could make baby food. It is difficult to explain just how foreign and overwhelming the whole thing was.

But I am a rule follower and I wanted to “do this” right…So I followed the books and started my son on cereal followed by a series of gerber veggies one at a time, etc. I did buy Earths Best organic baby food because one of the only mommy friends I knew at the time had bought those for her son.  Funny (true) story: our cousin was graduating from law school in Washington, D.C. I wanted to pack my son’s baby food for the trip but my husband didn’t let me. He said “Caro, surely there is a grocery store in Washington DC where we can buy his baby food. Its kind of ridiculous to travel with all this stuff. I conceded but not happily. When we got to dc, we were in a college town. Much to our surprise there WERE NO local grocery stores to buy baby food. We didn’t have a car. There was only little specialty places and a cvs type place. I remember walking in  and seeing in one little corner a few jars of baby food. They had sweet potato and banana. My poor son ate nothing but sweet potato and banana for 3 days because it never dawned on me that I could actually give him real food in soft pieces or mashed. I’m not sure what exactly I thought would happen to him if I gave him adult food but being the rule follower, paranoid first-time mother that I was, if it wasn’t made by gerber or earths best, he was not having it.

Wow!!!!! I’ve come a long way.

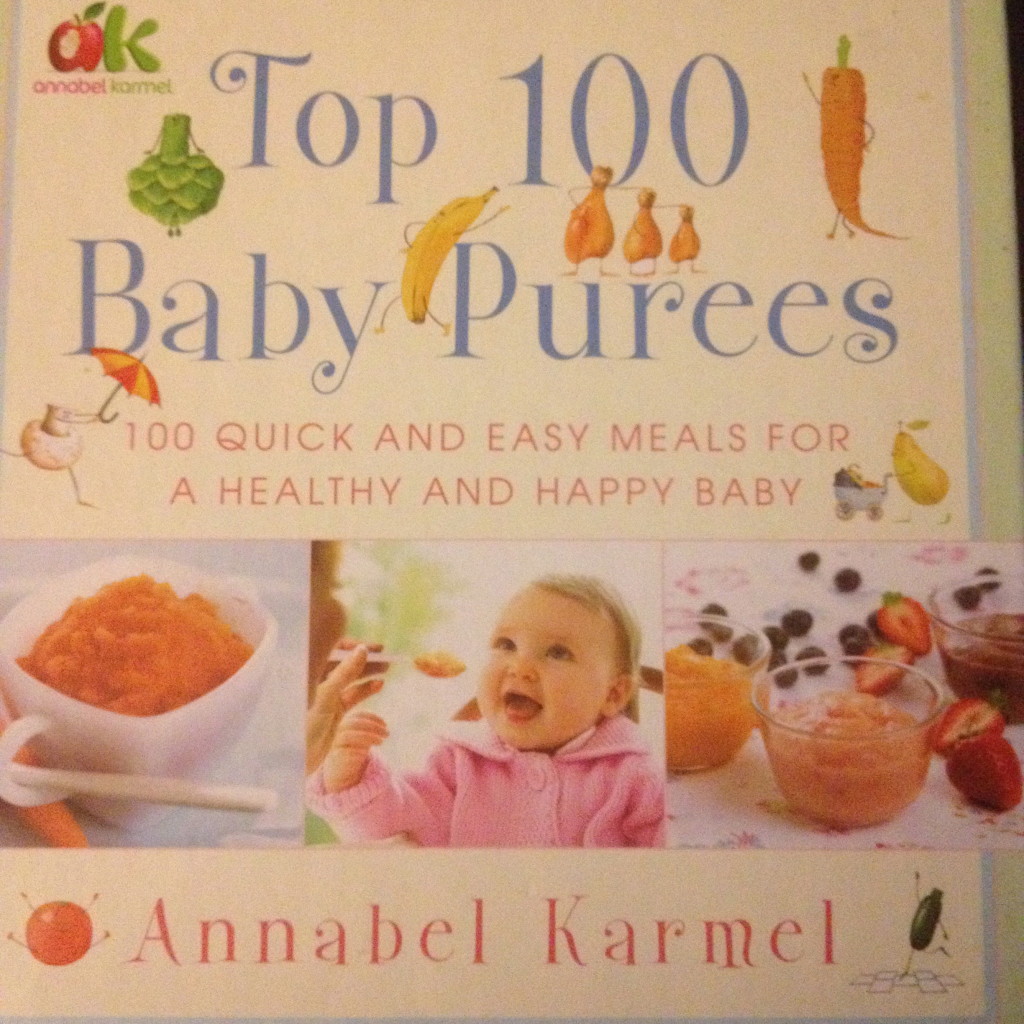
It wasn’t until Justin (my second son) was born that I was able to wrap my head around this baby food concept. I’ll never forget when my paradigm shifted. I was talking with a girlfriend of mine and I casually mentioned to her that I was curious about people who made their own baby food. She told me she made her own baby food and immediately offered me a book that helped her get started ” Top 100 Baby Purees”

IMG_3961

(This is yet another example why it is so important to have a community of people around you to offer you ideas and support and help you grow)

When she brought me the book, I was expecting nothing short of a science project. To my defense, I don’t cook at home and I am (WAS) intimidated by the kitchen. When I opened the book and realized that to give my son “baby food banana” all I had to do was peel a banana and mash it with a fork, my world literally opened up. Its that easy. Really? On one end I was totally relieved, and on the other end I was totally embarrassed. How did this not dawn on me before? Talk about some serious tunnel vision.

I began with the easy stuff first and then I moved on to the more challenging meals like cooking with raw chicken. Yuck – but doable. Pretty soon I was buying more advanced baby food books and giving my son food was exciting and fun. My possibilities were endless.

Making my own baby food changed my life. Not only was I offering my son a much wider variety of non-processed foods but I believe that this was the first baby step I needed to move into my own healthier life style. Making baby food involves combining single ingredients and whole foods. When I was ready for my own transformation I thought about food very much in the baby food sense. I moved away from the boxed foods and the never ending ingredient lists that had more science words than food words. My salads, smoothies, soups, and snacks were nothing more than baby food with stronger spices. Something that may seem so simple to someone else, lifted a veil off my eyes and allowed me to see a whole new world.

By the time my third son was born, I had learned so much and grown so much that his very first solid food was egg yolk and avocado. Wacky huh!!!!! Turns out cereal is not the best first solid to offer your kids contrary to popular opinion. You’ll have to wait for another blog post to learn why!


Ratatouille

Friends, this is more than just a movie about a mouse who can cook. This is a delightful meal that hopefully will become a weekly staple in our home. I’m blown away by it!!! So we went back to our Annie’s box of Organics last week. At some point in November, I had cancelled my subscription. I had some issues with the box.

The cons:
1. we get berries but never enough for the size of my family so the one box of blueberries goes the first day we get the box.
2. the box can sometimes get repetitive and we get the same vegetable a couple of weeks in a row (i.e. potatoes…and we really don’t eat potatoes, so that gets annoying)
3. some of the items in the box doesn’t have to be organic so we’re paying organic prices for some veggies we really can get cheaper elsewhere (i.e. avocados)
4. we don’t get to choose what we get.

We thought we had gotten to a place where we had explored most of what the box was going to give us and really we were veggie-savvy enough to go to Whole foods, or Publix or any other market and get whatever vegetables and fruits we wanted for the week without having someone else pick it for us.

RESULTS… The variety declined. Even though we would only get one little box of berries every other week, at least we were getting a box. We’d go to Whole Foods every week and rarely can we find organic berries. At least at our store. They’re simply not available. So we’d end up not eating berries at all instead of our one little box that we all enjoy thoroughly!
And then we started falling back on the most comfortable dishes…our cabbage soup, our salmon with cauliflower and asparagus, our veggie tray…but week after week we were eating the same meals and I even found myself going back to my blog to re-discover some of our own recipes because I didn’t know what to buy at the store.

THE SOLUTION:

January 7th we went back to our box. I went online and found that in the 2 little months I had strayed they had started a new box that they call the Paleo box. (Note: we are not on a Paleo diet but what I like about the Paleo box is that it excludes potatoes, which we rarely eat and don’t care to get in our box). So that was a good solution to one of our box complaints. And I also realized I could tweek my box however I wanted. If I want to add berries, I can pay a little more for that. If I’ve gotten one veggie too many weeks in a row, I can email them and ask them to substitute it with another item for the following week. There are options, I was just not exploring them. Of course I still have to go to the store and buy certain staples that didn’t come in my box. But I just simply love having my refrigerator stocked with veggies and fruits week after week and once I have them at the house, we eat them. Whereas for the last couple of months, I was buying fruits and vegetables of course because that is the main source of our diet, but I was actually being more repetitive when I was choosing them for myself, getting less variety (meaning less sources of nutrients) and always trying to remember what we would get in the first place. I feel like I have reconnected with my greens again and it feels wonderful!

But best of all… I discovered that I love having vegetables in my home that I did not choose at the store. WHY??? Because it forces us to use that vegetable before it spoils, and therefore look for recipes around that vegetable. That has proved easier for us than choosing a recipe and buying vegetables for that recipe. With 2 kids, 1 on the way, and work…we don’t have time to sit in front of a computer and browse through random recipes. But what is easier is googling – “eggplant recipes” and finding something that fits with our lifestyle.

And that is where our Ratatouille was born!! Ratatouille is basically a baked dish of layered vegetables. Yesterday we had an eggplant sitting in the fridge from our box last week (one of the only remaining vegetables in the fridge) and I told Orlando we had to use it. He browsed some recipes and decided to make the Ratatouille. Luckily we also had Shitake mushrooms from the last box and got heirloom tomatoes in the new box…ingredients that go into ratatouille. As usual, Orlando took what he liked from different recipes and came up with this…

Here is the recipe:

1 large Onion (sliced)
1 large eggplant (skin-on and in 1/2 inch cubes)
2 or 3 large tomatoes (thinly sliced)
2 cups mushrooms (sliced)
2 or 3 zuchinni (evenly sliced in rounds)
6 cloves of garlic (chopped)
salt/pepper
olive oil
parmesan cheese
1/2 large red bell pepper (chopped)
1/2 large green bell pepper (chopped)

Instructions:
– Preheat the oven to 375
– Chop and slice the veggies
– Saute the onion, mushrooms, and bell peppers in little olive oil adding salt and pepper
Make sure to not saute for too long. We are just trying to cook them down a bit, we don’t want them caramelized. I’d say 5 min max. Then set aside in a bowl.
– Now saute the eggplant in olive oil for about 8 minutes. The eggplant tends to soak in the oil, but don’t go over-board with olive oil either. Then when the 8 minutes are up, add the fresh garlic and saute for another 2 minutes. Don’t forget to add salt and pepper while cooking!
-In a baking dish arrange just over half of the eggplant mixture
covering the bottom
-now layer the zuchinni slices on top like you are making a lasagna
-lightly oil and salt the zuchinni
-Now do the same with the tomato slices. Layer them on top of the zuchinni slices covering the top like you are making a lasagna. Add Salt and pepper to the tomatoes.
-Now layer the onion, mushroom, and pepper mixture on top of the tomatoes.
– Add a nice bit of parmesan atop the mixture
– layer remaining eggplant
– layer remaining zuchinni
– layer remaining tomatoes
– layer remaining onion mixture
– Add parmesan
– Place foil on top and bake for 45 minutes

We served this on whole wheat cous cous, but I think that quinoa or millet would be great too. The texture of the cous cous was awesome with the veggies.The cooking time on this dish is 45 minutes, which is a long time…but Orlando says that its not a labor intensive meal because there aren’t that many ingredients. I would suggest, if you are pressed for time, preparing it on a Sunday night so that you only have to put it in the oven the next day. I loved it so much I can’t wait to have it for lunch today and give it to the boys for dinner!

We hope you can enjoy it as much as we did!

Superfood Monday Smoothie

Happy Monday to all!!!!! So today is the day where the grand majority of us started our regular routines again. Kids are back in school, we are back to work and 2013 is in full effect. Orlando and I were committed to starting today with a bang. It is incredible how just a little organization and planning makes one feel so much better prepared for the day to come. For example, we made sure we went to bed early in order to get a good night’s rest, had the house clean, picked up the drycleaning, did the groceries…all those little details put us in a great mental state and that made all the difference.

As you know I’m in charge of breakfast and lunch so I wanted to power up Orlando, myself and the kids with a superfood smoothie.

We buy a superfood called PURE SYNERGY. What does it have…. almost anything healthy you can imagine from algae such as spirulina, chlorella, kelp to fruits, vegetables and herbs such as kale, collard, wheat grass, sage, rosemary… and the list goes on. It is exactly what it purports to be…SUPERFOOD! and it is a brand we trust.

So this morning I made the following recipe:

SUPERFOOD SMOOTHIE
1/2 Quart almond milk
1 tbsp of PURE SYNERGY Superfood
1 tbsp of cocoa powder
1/2 avocado
1/2 banana
4 drops of stevia

I have bought a green superfood from Whole foods also called Green Vibrance that I think is great. I know the smoothie sounded to me a bit more adventurous than most people are comfortable with but I think its totally worth trying. So I urge you to try it if you dare!!!!! Your body will thank you for it!

I finally mastered the art of making Quinoa!

Friends, learning to make that perfect Quinoa has been a long process for me. My husband is the chef. That’s just the way things are. But I have certain responsibilities in the kitchen, simply because I have to feed my children usually before he gets home. So making Quinoa has fallen square on my shoulders. Since that is the type of food that is made in larger quantities, Orlando usually uses “my” cooked Quinoa for his recipes. And its always something. Its too bland, or  too mushy, or too hard…I just hadn’t quite tweaked it. Until now!!!! I finally figured out what I had been doing wrong!!!!!!! YAY!!!!

Here is the issue…certain quinoa boxes will tell you to add 2 cups of water per cup of quinoa, others will tell you 1 1/2. Some Quinoa recipes recommend rinsing the quinoa and others don’t. I read about it and feel that you should rinse your Quinoa because it contains Saponin – and that creates a bitter taste. When you rinse it you remove that thin layer of Saponin that it has.

But if you add 2 cups of water after rinsing the Quinoa…now you’ve got yourself some mushy quinoa!!! Too much or too little water creates a huge problem for those little grains and of course, I have fallen victim to both scenarios! Until now!

So here is my perfected Quinoa recipe. 

  • 2 cups of Quinoa
  • Rinse quinoa in water and drain the water as best as you can
  • then add about 1 cup of water or chicken broth (I like broth better) per cup of Quinoa.  When I say about 1 cup its because I put in a generous cup – more than 1 cup but less than 1 1/2. But somewhere in that range.
  • Add whatever you want – carrots, zucchini, peas, garlic cloves, cinnamon stick, raisins, broccoli …any veggie you want.
  • Bring to a boil
  • Put a tight lid on and bring to a simmer for 15 minutes – and DO NOT OPEN THAT LID AGAIN!!!!! Let it cook!!!!! When it beeps, you will have a fluffy Quinoa. AT LAST!

My husband made the Fried Quinoa with kimchee recipe the other day at home and actually told me that the Quinoa was cooked perfectly! But I didn’t make enough so he asked me to make 1 more cup… I was scared my success was a one time wonder but sure enough the second batch came out as good as the first! The recipe came out so spectacular that we may actually post a take 2 round of this recipe because Orlando tried it for the first time on video with you all and now he has really perfected it. So keep your eyes peeled!

NOTE:  I couldn’t end this post without elaborating a little bit more on adding veggies to your Quinoa. It is not necessary to do so, however, I strongly believe you should never pass up the opportunity to pile on veggies to your meals.  Especially, if you are a beginner eating vegetables, or just aren’t so crazy about them…. chopping them up into little pieces and adding them to things like Quinoa makes them an insignificant part of the meal from a taste perspective…but all their fiber and nutrients and minerals are making a significant impact in your body. So, be bold. Add vegetables any where you can. Your eggs, your pizza, your quinoa….aim to have at least 1 vegetable with every meal. You won’t regret it, and you may even start liking them if you don’t already!!!!!!!!!!!! Never stop PILING ON THE GREENS!

This veggie recipe deserves its very own post!

I’ve mentioned this veggie recipe in two different posts but it is such a good and simple recipe that I don’t want it to get lost or ignored in the other posts. PLUS, Orlando has added a new ingredient and it must be shared!!!!!

Its simple.

Asparagus, Leeks and Onions

  • chop 1/2 bunch of asparagus into 1 inch pieces. (to avoid the stringiness of the asparagus, break off the bottom portion of the asparagus)
  • 2 small Leeks or 1 large Leek, thinly sliced
  • 1/2 an onion chopped into small pieces
  • Sautee with olive oil, salt and pepper for about 7 minutes in a pan at high heat (maybe an 8)
  • The bottom of the pan will start to crust up. Then drizzle a little bit of marsala wine (about 2 ounces or less) on to the pan. Then you deglaze the vegetables (mix in the vegetables and wine with the crust for a delicious flavor)

But last week, Orlando added Brussel Sprouts to the mix. WOW! Delicious.

Brussel Sprouts were NEVER on our grocery list. But of course they came in our Annie’s box one day and we were forced to try it. My first impression was…they’re ok…but I wasn’t inlove. That soon changed. The more often Orlando cooked them, the more I liked them. They are now a staple in our home. If you’ve never had Brussel Sprouts and are hesitant to taste them, I suggest making them in this recipe for your first try. I think you will be pleasantly surprised!!!!

So the recipe remains the same except that I have incorporated the brussel sprouts in it:

  • 1/2 a portion of brussel sprouts, cut off the bottom part, and cut in quarters.
  • chop 1/2 bunch of asparagus into 1 inch pieces. (to avoid the stringiness of the asparagus, break off the bottom portion of the asparagus)
  • 2 small Leeks or 1 large Leek, thinly sliced
  • 1/2 an onion chopped into small pieces
  • Sautee with olive oil, salt and pepper for about 7 minutes in a pan at high heat (maybe an 8)
  • The bottom of the pan will start to crust up. Then drizzle a little bit of marsala wine (about 2 ounces or less) on to the pan. Then you deglaze the vegetables (mix in the vegetables and wine with the crust for a delicious flavor)
  • Last step is to put a lid on the pan for about 2 minutes. Then take off the heat and VOILA! (the reason we add this step is because those last 2 minutes steam the brussel sprouts and soften them to perfection!!)

Not only is the recipe delicious, but you are now incorporating 4 vegetables as your side dish to your plate. This means vitamins, minerals, fiber, folate, antioxidants…health!!!!!

We hope you enjoy it!!! Let us know in the comments section if you made this recipe and what you thought about it! Also, don’t forget we will be answering questions once a week so don’t be afraid to ask!!!!!!


Fearless Friday Pizza

Hello all!  Sorry I couldn’t get to last week’s Fearless Friday meal, but this pizza will more than make up for it.  We mentioned the cauliflower pizza a few months ago on the blog, and I thought this would be the perfect time to give you the recipe for a weekend treat.  This pizza has no flour at all!  The crust is mainly cauliflower and fat-free cheese.  The raw “dough” is EXTREMELY sticky, so don’t even think about doing this if you don’t have parchment paper handy.  You can buy it at any store in the same section where you find the aluminum foil.  If you do it on foil (or anything else for that matter) the pizza will stick and be inedible!!!

The first time I made this pizza I failed miserably (see sticky-problem above).  Then one day Caro told me she was in the mood for some homemade guacamole.  We searched high and low for crackers or bread to dip, but we didn’t have either at the house.  I told Caro that this may be a good time to make the crust, break it into pieces, and dip in the guacamole.

I made the crust and thought to myself, “do I dare make a guacamole pizza?”  And that is exactly what I did.  You can put any toppings you want on this crust, but the guacamole pizza was awesome.  I’ll give you the recipe for the crust and the guacamole and you decide for yourself what toppings you want.

GUACAMOLE:

  •                     3 Haas avocados (peeled and mashed)
  •                     1 lime  juiced
  •                     salt and pepper
  •                     2 tablespoons chopped fresh cilantro
  •                     2 roma (plum) tomatoes, diced
  •                     1 teaspoon minced garlic
  •                     1 pinch ground cayenne pepper (optional)
  •                      1/2 a Jalapeno (optional)

Just mash it all up together.  You can use a blender, but don’t over-blend.  We still want some chunks in there.

CRUST: 1/2 LARGE head cauliflower (or 2+ cups shredded cauliflower) 1 large egg 1 cup low-fat (skim) shredded mozzarella cheese 1 teaspoon dried oregano 1/2 teaspoon dried minced garlic (or fresh garlic) 1/2 teaspoon onion salt

TOPPINGS: The same mozzarella listed above and whatever toppings you choose (try my guacamole for God’s sakes!!!)

Directions:

1.  Shred the cauliflower into small crumbles.  You can use the food processor if you’d like, but you just want crumbles, not puree.  You want them to look like rice.  In fact, the process is called “ricing” the cauliflower.

2.  Prepare the crust:  Preheat the oven to 450 degrees F. Place parchment paper on top of a cookie sheet and spray nonstick spray on it.  In a medium bowl, mix the cauliflower crumbles with the remaining crust ingredients.  Pat the “crust” into a 9 to 12-inch round on the prepared pan.  Spray the crust lightly with nonstick spray and bake for 15 minutes (or until golden).  Remove the crust from the oven and turn the heat up to broil.  Why, you ask?  Because the crust is already cooked.  We are broiling only to melt the cheese on top of your pizza.  Remember to leave the oven door open when broiling!!!  You want to keep a close eye on it so it doesn’t burn.

3.  Prepare the pizza:  Spread the guacamole or tomato sauce on top of the baked crust, leaving a 1/2-inch border around the edge.  Sprinkle 1/4-1/2 cup cheese on top (plus any toppings you choose)  Broil the pizza 3 to 4 minutes, or until the the cheese is melted and bubbly.  Cut into 6 slices and serve immediately.

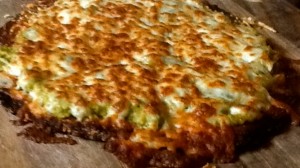
Cauliflower crust with Guacamole Pizza

There you have it!  This pizza is awesome and isn’t hard to make at all.  The guacamole is even easier.  Enjoy the your weekend and please give us feedback to let us know your thoughts.

Back to School – Snacks for Kids

Hi everyone! Its been a while since our last post, and there’s a reason for it…there has been sheer chaos in our home! We took the end of the summer to do some much needed upkeep to our home. Painting, redecorating, reorganizing…etc. Among which, the most important for us, is that we put both boys in the same room, in preparation for the new baby…wish us luck!!!! So finally the first day of school arrived and both boys started their journey.

On to food…

Now they go to nursery school so they are only there from 9am – 12pm. The way it works there is that each week one child’s parent is responsible for bringing snacks for the kids that week. Each week the parents go rotating until its your turn again. Then if you leave your child to stay past 12… for lunch bunch and kid’s club, then you are responsible for providing your child with his own lunch also. Of course every school has a different system.

So yesterday I pick up my boys at 12 and the first thing Orly tells me when he runs out of class is “Mommy, you know what they gave me for snack… doughnuts and juice

Here I am trying to teach my kids a healthy lifestyle and they leave me for a few hours to go eat doughnuts and juice. The question is, what can I do?

Bring my own snacks for the teacher and tell her that my children are not allowed to eat that sugary stuff… then my kid will be the only kid in the class that can’t eat the snack while all the other kids enjoy it. Well i’m not willing to do that for 2 reasons. 1. I don’t want my kid to feel that he is deprived from eating anything because i’m afraid he’ll rebel against me later and become a junk food addict! 2. I don’t want my kid to be alienated or considered weird simply because of what I say he can and cannot eat, and we all know kids can be cruel. Or keep him out of school until he has to go, well that really only delays the problem, and I happen to love school and the development and routine that it offers children. So I sit here frustrated. My kids will spend the next 9 months having sugar shoved down their throat. Snacks, birthday parties, bake sales, Friday Pizza parties, holidays, school functions, you name it! Now i’m okay with my kid enjoying candy on Halloween. I’m not completely neurotic. But doughnuts and juice for snack at 10:30am on a regular day is just too much for me. In any event, I smiled and ignored the situation and made sure my kids ate good, healthy, balanced meals the rest of the day.

So I only have 2 options left… make sure that my kids are eating well the rest of the time at home with me, and try to educate parents and create a community of awareness to see if we can improve what we feed our children. And I say create awareness because I don’t think this mom meant any harm by bringing doughnuts for snack. We all want what is best for our children. I think the issue is that a lot of people view food as weight-related exclusively. Most children don’t have weight problems (although children obesity is on the rise)… so in parents’ eyes… they think what they feed their children is not a huge issue because their children do not have a weight problem. So the mentality is “my kid doesn’t really have to worry about not eating that doughnut until he’s older.” Because the truth is that the kid is going to go to the playground and burn off whatever calories he consumed from that doughnut in a minute. So the parent sees the doughnut as a fun treat and they’re just kids after all and they can afford it so why not give them a small pleasure? The problem is that its not only about weight anymore. It is now becoming clear that food does affect your health. And furthermore, the flavors and tastes you develop now will largely influence you in your adult life. Sure you can acquire new tastes and learn how to eat healthy as an adult,( my husband and I did), but why not make it easier on our children and give them a foundation now…so the learning process is not so difficult later? I realize that one doughnut will not harm my child…but I definitely want to stop creating a sugar addiction in our society because it is serious and our health is suffering as a result of it. Here are some ideas I thought would be good to share for our kids to eat at school…and as always, my research continues so your feedback is welcomed!

Good Snacks to take to your child’s School

Water instead of juice – a lot of juices come with sugar added (even organic ones) which is completely unnecessary. Some juices are 100% concentrated juice and that’s not terrible for kids and does have nutritional value. However, when you’re drinking fruit juice you are eliminating all the fiber from the fruit. So, for me, I find that water is a better option. Especially in our case because our children consume huge quantities of fruit daily. Whatever minimal nutrition they would derive from the fruit juice they are getting from actual fruit.

Fruit – Grapes are a great snack for kids because kids love bite sized foods. (For certain ages, the grapes must be cut in half to avoid choking hazards). Sliced apples, blueberries, raspberries, strawberries. Cut up pineapple pieces. Mandarin oranges. Any fruit that you can give in bite size or can be chopped up into small pieces (that are not choking hazards) is great for snacks.

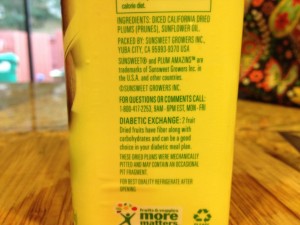
Raisins – my kids love raisins. Raisins are super high in sugar but if you buy raisins where there is not sugar added, then it is still a whole food and is a good source of fiber. I also found this awesome treat. Plum amazins. They have half of the sugar that raisins have and are delicious. I’m using them in my salads no instead of cranberries and the kids love them. These are a great snack.

Granola – a good quality granola that is not super high in sugar is great for the kids and has a good amount of protein. Its delicious to give them some fruit with granola or yogurt with granola. I buy organic granola from Whole Foods.

Greek Yogurt– Oikos is a great yogurt and they sell small ones that are perfect for kids. You can buy these yogurts with fruit added and your kids are getting good probiotics and a delicious treat.

Baby carrots and celery sticks – carrots are one of the few vegetables that I have found are easy snack foods. I’m always looking but so far this is it. You can always offer a little dressing to dip in the carrots or celery sticks to add flavor but I would offer them alone first and see how they like it. In my case, I give my son celery sticks with a good quality peanut butter but for school, this can be a problem due to the large nut allergies that children have. (So if your child is not allergic to peanut butter, that’s a good option for a home snack.)

Instead of candy, offer Dark chocolate – If you want to give your child a sweet treat, try some dark chocolate instead of candy. Some consider dark chocolate to be too bitter, but I find that small children acquire a taste for it very quickly. Exposure is everything. You would be shocked at the things your kids would eat if they were exposed to it. In my case, I buy 86% chocolate for the kids as an after dinner treat – same treat we give ourselves! And my kids literally beg for the chocolate! To them, chocolate is chocolate and they view it as candy. So if they eat a good portion of their food (I don’t force them to finish their plate but I do want to make sure they eat), I give them each a piece of dark chocolate afterwards. Ghirardelli offers these dark chocolates cubes wrapped in individual pieces already, so I think that would be a fun option to try for snack at school. It does have added sugar but its 86% raw cocoa so the 14% is not too significant. I’m actually going to try it during my turn for snack week at school and see how it goes. The younger the kids are when you expose them to these tastes, the higher the chances they will grow to love them.

Do you know of any healthy, allergy-free snacks that are good for kids? If you do, please comment on this post and offer suggestions to parents who are desperately looking for good alternatives for their kids.

Cheers to a great school year for all of our children!!!!

Fearless Friday Meatloaf

By Orlando:

Thank God its Friday!!! And you guys know what that means…another Fearless Friday suggestion for a minor weekend cheat. Today’s recipe is one of my favorite meals. I don’t make it as often as I used to because I don’t find it healthy enough to eat every week. However, weekends are another story, and it is still an extremely health take on a home-cooked classic: meatloaf.

Instead of ground beef I use ground turkey. Use a 93/7 blend or 93% fat-free. If you use a “fat free” or 99% fat free turkey it will be extremely tough. The lack of fat will result in it turning into a rock. If you get the turkey any fattier than 93% it will be too fattening and you might as well use ground beef.

Instead of regular bread-crumbs, I toast 2 slices of Ezekiel bread and grind in a blender or food processor, thus making my own home-made, unprocessed bread crumbs. The full recipe is below.

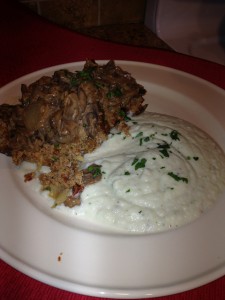
I like to make the meatloaf with traditional sides made in an untraditional fashion. Nothing goes with meatloaf like mashed potatoes. But instead of potatoes, I make a cauliflower mash, which is much healthier and tastes really good. You get some of the texture of a mashed potato with a fraction of the carbs. I also posted the recipe for the Cauliflower mash below.

Finally, you want to have a vegetable dish. I like green beans with my meatloaf and mash. Obviously you can make any veggie you want, but I find it to be a traditional side that matches very well.

Turkey Meatloaf

  1. 1 pound ground turkey (93/7)
  2. 1/2 cup of bread crumbs (try toasting Ezekiel bread and blending/processing them)
  3. 2 eggs
  4. 1/4 cup of chopped Italian parsley
  5. 2 tbs milk
  6. 1/2 cup grated Romano cheese (Grate your own! don’t be lazy and buy that powdered garbage in a container they sell off as Romano!!!!!)
  7. 1/4 cup of chopped sun-dried tomatoes (you can buy them in oil or normal, but I like to save the calories and don’t buy the ones in oil)
  8. salt and pepper to taste. I also add “Sason Completo”
  9. 6 or 7 asparagus chopped (did you really think I wouldn’t sneak in a veggie???)
  10. Whatever glaze you choose (more on that below)

Pre-heat the oven to 375. Mix all the ingredients EXCEPT the turkey in a large bowl. This should make a nice wet “paste-like” consistency. Now add the turkey and combine well with clean hands (yes, with your hands). Remember that the seasoning is in the paste, so mix it well. Pat the mixture into a meatloaf shape and place on a parchment paper lined cookie sheet. Before placing in the oven, I like to put a sauce on top. Some people put ketchup, but I like Asian glazes like General Tso’s sauce, Thai Chili sauce, or even a Hoisin sauce. I know that these sauces have a lot of sugar, but remember two things: 1. most of the sauce slides off the meatloaf…only a fraction of it actually forms a crust and 2. it is Fearless Friday for God’s sakes!!! Live a little!!! Place the meatloaf in the oven and remove when it reaches an internal temperature of 160-165 (about 40 minutes).

What’s that you say? Did you just ask me how you would know the internal temperature? You mean you don’t own a food thermometer? Get off my website! Ok, wait, don’t get off the website, we could really use the page-views!!! Just buy an internal thermometer please!!!!

Cauliflower Mash

  1. 2 heads of cauliflower chopped
  2. 2 tbs organic butter
  3. about 1/2 cup of grass-fed milk (in the alternative, you can try organic)
  4. salt and pepper

Boil the cauliflower in water until tender. Place in blender with other ingredients and blend until smooth. Taste it and add salt and pepper to your liking. I don’t measure the amount of milk I put in. I go by sight, so the 1/2 cup is an estimate. Start with 1/4 and add until you reach your desired texture.

Green Beans

Get a bag of green beans and snip the edges off the beans. You can buy them already snipped…makes life much easier. Toss in a bowl with olive oil, salt, and pepper. (sound familiar? I love this method). Place in the oven for about 25 minutes. Taste one, and if you think it needs more time, leave it longer. They should have nice color and lose its waxyness.


My Veggie Tray

I find roasting vegetables to be the most delicious method of cooking them. One of my favorite techniques is using whatever extra veggetables we have in our house, particularly the ones that are getting old, toss them in olive oil, add salt and pepper, and bake at 400 for 30-40 minutes. Almost all vegetables roast well. In fact, the only one I don’t roast is broccoli because it dries out too much.

The veggie tray is great for many reasons. First, it uses up some of the veggies that are going or will soon go bad. Second, it leaves a ton of leftovers that you can have for lunch (yes, I eat the veggies for lunch by themselves, they are that good) or feed the kids for dinner by simply reheating. Third, you can eat all you want…it’s all good for you–stuff your face!!! And finally, it is healthy, easy, and tastes awesome. Just toss, place on a cookie sheet, and close the oven door.

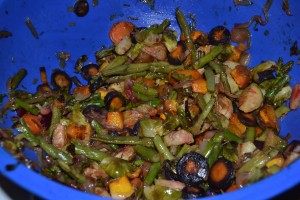
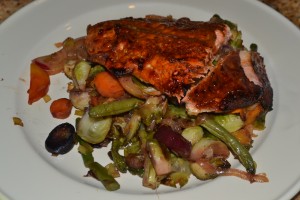
In this particular tray I used, Chopped carrots, green beans, a container of Brussel Sprouts (sliced), zucchini (rough chopped), and butternut squash (cubed in small pieces). I tossed them in a big bowl with olive oil, added salt and pepper, and roasted for about 40 minutes (start tasting them at 30 minutes for doneness). Seperately, I roasted some baby beets in aluminum foil in the same oven for the same 40 minutes.

After I had the veggies in the oven for about half an hour and they were almost done, I sauteed an onion, a bunch of asparagus (chopped in bite-sized pieces), and 2 leeks on a pan. I highly recommend that you make that as a side dish on its own one day. But for this dish, I love combining the onions and leeks with all the other veggies because it gives it more of a stir-fry flavor and texture. Cobine the veggies from the tray with the onions, leeks, and beets. And that is it!

Ingredients: Olive Oil, Salt, Pepper, Carrots, Beets, Green Beens, Asparagus, Leeks, Onion, Brussel Sprouts, Butternut Squash, Zuchinni (Healthy enough for you?)

There is really no limit to what you can do with this dish. You can choose to make the dish how I make it, or you can simplify your life and just roast the veggies. You don’t HAVE to roast the beets seperately or sautee onions and leeks. I just love it that way and don’t mind the extra steps. Feel free to add or subtract any veggie you want…you are only limited to your imagination and the produce section of your grocery store.

Along with the veggie tray, I made wild-caught salmon with an Asian 5 spice rub. This is super easy. Make sure to pull all the bones out of the Salmon (tweezers work like a charm). Put the rub on, add your favorite Asian sauce on the Salmon (they are often high in sugar, but only a little will crust on the salmon after Broiling). Then place it directly under the broiler for about 6-8 minutes. Remeber to use wild-caught salmon, it is MUCH better for you than the alternatives. Also remember that when using the broiler you should always leave the door open so you can watch the food. It can go from awesome to burnt in no time.

The meal was delicious and filling. We made so many vegetables that the next day we had leftovers for lunch. Caro gave the remaining salmon the following day to the kids with a sweet potato and they devoured it.

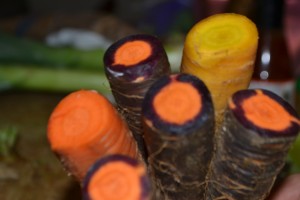
Below is a picture of the Heirloom carrots I used in this dish, the veggies being tossed together in the bowl, and the final product respectively.


Vegetable Medley